


Essential Steps for Professional Heating System Installation
Heating Installation, Step by Step: A Practical Guide for Coachella Valley Homes and Businesses
Installing a heating system is one of the smartest investments you can make for a home or business here in the Coachella Valley — where warm days can turn into cool nights. This comprehensive guide walks you through the professional installation process in clear, practical steps, empowering you with the knowledge to make informed decisions and ensure your comfort. We cover everything from the initial assessment and precise system sizing to preparing the site, safely removing old equipment, thorough ductwork inspection and necessary upgrades, the meticulous installation itself, accurate thermostat setup, and the final walkthrough. By following these detailed steps, you can confidently avoid common pitfalls and secure a reliable, highly efficient heating system perfectly tailored to your property's unique needs.
What should happen during the initial assessment and system sizing?
The initial assessment and accurate system sizing are critical steps that lay the foundation for a comfortable, energy-efficient heating installation. During this crucial phase, our technicians meticulously verify that the heating system you choose—whether a furnace or a heat pump—is perfectly matched to your property's specific layout, insulation levels, window exposure, and existing HVAC infrastructure. This ensures the system performs optimally, delivering consistent comfort without wasting valuable energy.
How do technicians evaluate a home for heating system replacement?
Home evaluations are a hands-on, detailed process designed to gather comprehensive data. Technicians begin by accurately measuring the total square footage and ceiling heights of all conditioned spaces using laser measurement tools. They then meticulously check insulation levels in the attic, walls, and crawl spaces, assessing their R-values to understand the home's thermal envelope. Existing ductwork and vents are thoroughly inspected for visible damage, proper sizing, and adequate return air pathways. Advanced tools like thermal imaging cameras may be employed to pinpoint areas of significant heat loss or air infiltration, identifying "trouble spots" that could compromise efficiency. In some cases, a blower door test might be conducted to quantify air leakage. The overarching goal is to create a precise thermal profile of the home, allowing us to match a heating solution to its unique characteristics so the new system runs efficiently and effectively from day one.
Which factors determine the right furnace or heat pump size?
Proper system size is determined by a complex interplay of several variables, not just square footage. Technicians perform detailed load calculations, typically following industry standards like ACCA Manual J, to estimate the precise heating requirements. These calculations factor in the home's total square footage and layout, ceiling heights, insulation quality (R-values), window types (single-pane, double-pane, Low-E), window orientation (north, south, east, west exposure), the number of occupants, and even internal heat gains from appliances and lighting. The local climate, specifically the average winter temperatures in the Coachella Valley, is also a critical input. A correctly sized furnace or heat pump delivers comfortable temperatures consistently, avoids inefficient short-cycling (where the system turns on and off too frequently), and maximizes energy efficiency. Conversely, an oversized system can lead to higher energy bills, poor humidity control, and premature wear, while an undersized system will struggle to maintain desired temperatures during peak demand.
Studies reinforce the value of designing HVAC systems with local climate and insulation levels in mind to achieve better energy performance.
How do we prepare your property and remove the old heating system safely?
Thorough site preparation before installation is paramount to reducing risks, protecting your property, and keeping the entire project on schedule. Proper preparation ensures that our technicians can work efficiently and safely during both the removal of the old unit and the installation of the new one, minimizing disruption to your home or business.
What preparations are required before removing the old heating unit?
Before any removal work begins, stringent safety protocols are meticulously followed. This includes shutting off all electrical power to the unit at the breaker panel and securing it with a lockout/tagout device to prevent accidental re-energization. For gas furnaces, the main gas supply valve is closed and tested to ensure no gas flow. The work area is then cleared of any obstacles, furniture, or personal items to provide ample space for technicians and equipment. Good ventilation is established, especially if working in confined spaces. Protective coverings, such as heavy-duty drop cloths and shoe covers, are laid down to shield floors and surrounding surfaces from dust, debris, and potential spills. All necessary tools, including specialized wrenches, cutting tools, and refrigerant recovery equipment, are staged for immediate access. Finally, access routes for moving the old unit out and the new equipment in are carefully checked and measured to ensure they are clear and wide enough, preventing any damage to walls, doorways, or landscaping during transit.
How is the old furnace or heat pump disconnected and taken out?
The disconnection and removal process is executed with precision and adherence to environmental regulations. Technicians first safely disconnect all electrical wiring, ensuring no live circuits remain. For gas furnaces, the gas line is carefully disconnected and capped. In the case of heat pumps or air conditioners, any remaining refrigerant is professionally recovered using EPA-certified equipment, preventing its release into the atmosphere. The old unit is then carefully unmounted from its platform or suspension, paying close attention to structural integrity and avoiding damage to surrounding components or the building itself. Once disconnected, the old equipment is systematically removed from the property. Special care is taken with heavy units, often requiring specialized dollies or lifting equipment. All components, especially hazardous materials like refrigerants, mercury switches, or old oil, are handled and disposed of in strict compliance with local, state, and federal environmental regulations, ensuring a responsible and eco-friendly process.
Why is ductwork inspection and modification important for a new heating system?
Ductwork is the circulatory system of your HVAC unit, directly affecting both comfort and energy efficiency. Even the most advanced new heating system will struggle to perform optimally if the ducts are leaky, poorly insulated, undersized, or obstructed. A professional, pre-installation inspection is crucial for identifying and rectifying these issues, ensuring your new unit operates at its peak potential from day one.
How do professionals inspect and seal ducts for good airflow?
Our professionals conduct a thorough inspection of your entire ductwork system, visually checking for obvious leaks, crushed sections, disconnections, and blockages. We may use smoke pencils or pressure testing equipment to pinpoint hidden leaks that are not visible to the naked eye. Once identified, leaks are meticulously sealed using high-quality mastic sealant for larger gaps and approved, durable foil tape for seams and joints. Any sections of ductwork running through unconditioned spaces, such as attics or crawl spaces, are assessed for insulation levels, and additional insulation is applied where needed. These critical steps significantly improve airflow, reduce conditioned air loss by up to 30% in some cases, and prevent energy waste, which directly translates into lower heating costs and improved comfort throughout your home or business.
Which ductwork upgrades help heating efficiency in desert climates?
In the unique climate of the Coachella Valley, specific ductwork upgrades can make a substantial difference in heating efficiency. Insulating ducts that run through unconditioned spaces, particularly hot attics, with a minimum R-8 insulation value is highly recommended to prevent heat loss before the air reaches your living areas. Upgrading from older, poorly sealed flexible ducting to rigid, well-sealed sheet metal or fiberglass ducting can significantly reduce air leakage and improve airflow dynamics. Furthermore, incorporating zoned dampers allows for precise temperature control in different areas of your property, ensuring that energy is directed only where it's needed, rather than heating unoccupied rooms. Properly sized duct runs, determined by load calculations and airflow measurements, are also essential to ensure adequate air delivery to each register without excessive static pressure, maximizing the efficiency and effectiveness of your new heating system.
What are the professional steps to install a new heating unit?
Installing a new heating unit follows a precise and reliable sequence of steps, meticulously performed to ensure safety, optimal performance, and long-term longevity. Each stage of the installation is executed according to industry best practices and local building codes, with rigorous testing conducted before the job is considered complete.
How is the furnace or heat pump physically installed and secured?
Technicians begin by carefully positioning the new heating unit on a stable, level surface. For outdoor heat pump units, this typically involves a reinforced concrete pad to minimize vibration and ensure proper drainage. Indoor furnace units are placed on sturdy platforms or suspended securely, maintaining all manufacturer-specified clearances for proper airflow, combustion air (if applicable), and future service access. Anti-vibration pads are often used to further reduce operational noise. Mounting points are securely fastened using appropriate anchors and hardware, ensuring the unit remains stable and safe. New flue pipes (for furnaces), refrigerant lines (for heat pumps), gas lines (for furnaces), electrical wiring, and condensate drains are then meticulously connected, routed, and sealed according to all applicable codes and manufacturer guidelines. Every connection is double-checked for integrity and safety before proceeding to the next stage.
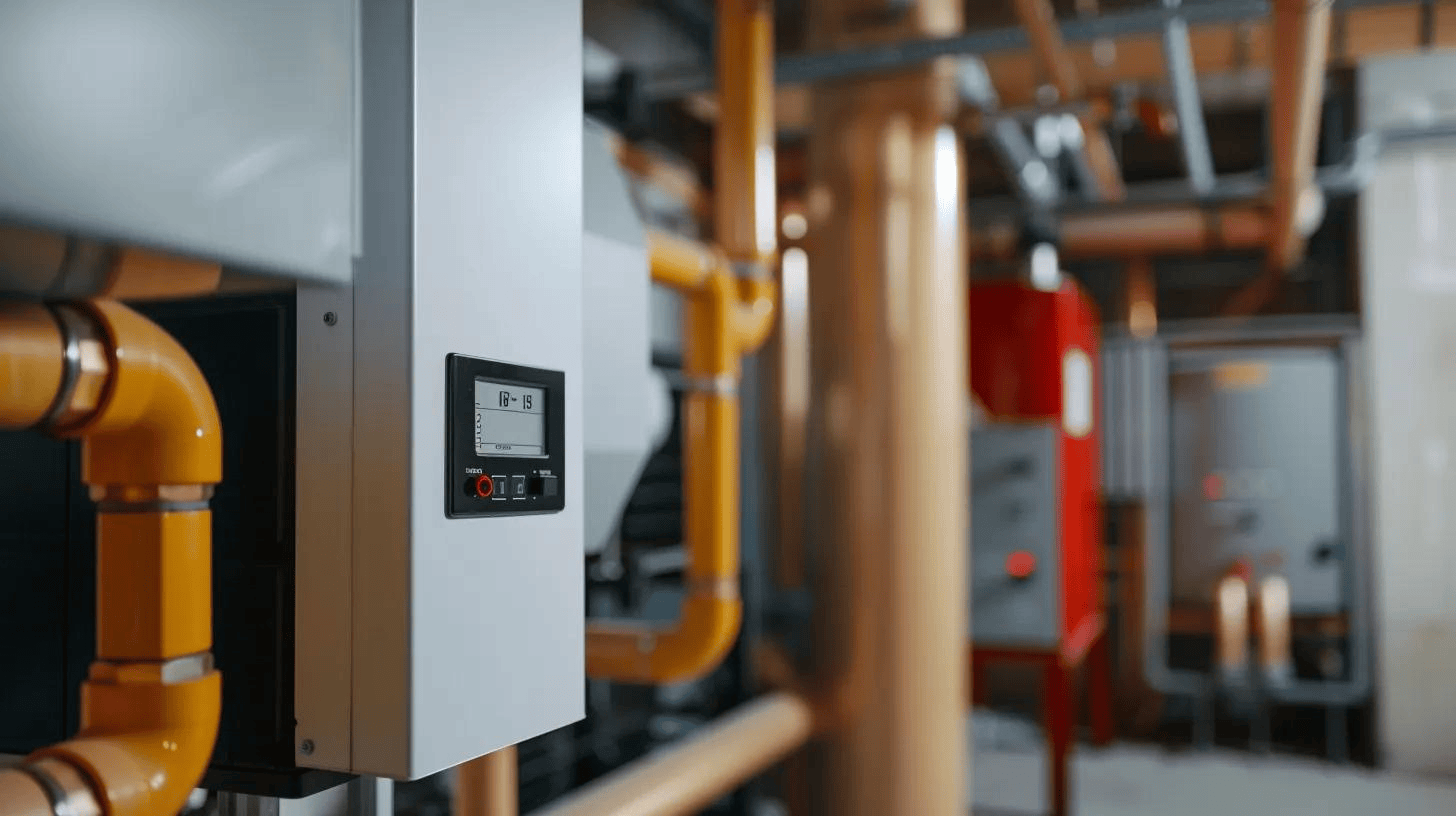
How is thermostat installation and system calibration handled?
Thermostat installation and careful system calibration are pivotal steps that ensure accurate temperature control, maximize energy savings, and guarantee the optimal performance of your new heating system. We meticulously verify all settings, connectivity, and system response to ensure your home heats comfortably and efficiently without any wasted energy.
What are the benefits of adding a smart thermostat?
Integrating a smart thermostat offers a multitude of benefits that significantly enhance comfort, convenience, and energy savings. These advanced devices allow you to program detailed heating schedules, often with 7-day programming capabilities, to match your daily routines. Many smart thermostats feature geofencing technology, automatically adjusting temperatures when you leave or approach your home. You can control your heating system remotely from anywhere in the world using a mobile app, or even through voice commands with integrated smart home assistants. Beyond convenience, smart thermostats learn your usage patterns and preferences over time, automatically optimizing settings for peak efficiency. For many homeowners in the Coachella Valley, this translates into tangible reductions in utility bills, often saving 10-15% or more on heating costs annually, while simultaneously improving overall comfort and ease of use.
How do technicians calibrate and test heating systems for efficiency?
After the physical installation, our technicians perform a comprehensive calibration and testing sequence to fine-tune your heating system for maximum efficiency and safety. This involves a series of precise measurements: checking the temperature rise across the heat exchanger (for furnaces) or the temperature differential across the coils (for heat pumps), verifying static pressure within the ductwork, and confirming proper gas pressure (for furnaces) or refrigerant charge (for heat pumps) using specialized gauges. All safety controls, such as the high-limit switch, flame sensor, and pressure switches, are rigorously tested to ensure they function correctly. We then adjust system settings and program the thermostat to align with manufacturer specifications and your desired comfort levels. The system is run through typical heating cycles, observing its performance, airflow, and temperature delivery to confirm efficient operation. All performance data and settings are meticulously documented for your records, providing a baseline for future maintenance.
What happens during the final walkthrough and customer education?
The final walkthrough is the culminating step of the installation process, where we ensure everything is working perfectly, provide you with essential knowledge on how to operate your new system, and offer valuable tips to keep it running smoothly for years to come.
How are post-installation checks done for safety and performance?
During the post-installation checks, technicians conduct a thorough review of the entire system. This includes re-checking all electrical connections to ensure they are tight and secure, performing a final leak test on all gas lines (for furnaces) using an electronic leak detector, and verifying that the condensate drain is flowing freely and correctly. We confirm that all supply and return vents/registers are open and unobstructed, allowing for optimal airflow. Thermostat communication with the heating unit is tested by setting various temperatures and observing the system's immediate and accurate response. All system cycles—from startup to shutdown—are monitored to ensure smooth and reliable operation. Any minor adjustments are made on the spot to guarantee you receive reliable, efficient performance from your new heating system starting on day one.
What maintenance tips should homeowners follow after installation?
Simple, regular care is crucial for keeping your new heating system efficient, reliable, and extending its lifespan. The most important tip is to change your air filters on a consistent schedule, typically every 1-3 months for standard filters, or as recommended by the manufacturer for higher-efficiency filters, depending on household conditions (pets, allergies). Always keep all supply and return vents clear of furniture, rugs, or other obstructions to ensure proper airflow. Additionally, booking an annual professional inspection and tune-up, ideally before the heating season begins, is highly recommended. These small, proactive steps prevent costly repairs, maintain optimal energy efficiency, improve indoor air quality, and often keep your manufacturer's warranty valid, protecting your investment.
This table summarizes the main steps in a professional heating installation and why each matters.
Conclusion
A properly installed heating system is the cornerstone of comfort, efficiency, and dependability for your Coachella Valley home or business. By understanding and following the detailed steps outlined in this guide, you can ensure your investment provides lasting warmth and peace of mind. Remember, leaning on our experienced technicians for professional assistance when you need it is key to a successful outcome. If you’re ready to upgrade your heating system or require a professional assessment to determine your property's specific needs, contact Apparatus Air Conditioning & Heating, Inc. — we are committed to ensuring your system is installed correctly, operates flawlessly, and delivers the comfort you deserve.

hear what our satisfied
clients have to say


.webp)