Heating Installation in Palm Springs, CA
Why a tailored heating installation matters in Palm Springs
Palm Springs homes face unique conditions: long cooling seasons, large daytime heat loads, and relatively cool, dry winter nights. That means the ideal heating solution often balances low running costs, compatibility with existing air conditioning systems, and minimal impact on ductwork and indoor air quality. Typical pain points homeowners report are inefficient heat that raises utility bills, uneven room temperatures, and systems that struggle during rapid temperature swings. A properly sized, professionally installed system addresses those issues from day one.
-min.webp)
Heating Installation in Palm Springs, CA
Heating installation in Palm Springs, CA requires a practical, desert-smart approach. Even though summers dominate the calendar here, cooler winter nights, mountain breezes, and greater temperature swings between day and night make a reliable heating system essential for year-round comfort. This page explains how a professional heating installation works in Palm Springs homes: from initial consultation and system selection to ductwork evaluation, installation steps, commissioning and homeowner onboarding — plus the efficiency choices and timelines you can expect.
Common heating options for Palm Springs homes
- Cold-climate and standard heat pumps - Efficient year-round choice that can replace or supplement central AC. Look for higher HSPF for better winter performance. Variable-speed compressors improve comfort and humidity control.
- Gas furnaces - Effective where existing gas lines are available and homeowners prefer quick, high-output heat. Modern modulating furnaces deliver more even temperatures and better efficiency (AFUE rating).
- Ductless mini-splits - Ideal for room additions, garages, or homes with limited ductwork. Offer zoned control and high efficiency, especially for partial-home heating needs.
- Packaged units - Useful for homes with rooftop or attic equipment configurations where combining heating and cooling in one outdoor unit is preferred.
Consultation and equipment selection
A professional installation starts with a focused consultation that addresses your home, lifestyle, and budget:
- Load calculation (Manual J) to size the system correctly, avoiding short-cycling or undersized equipment that cannot maintain comfort during cold snaps.
- Ductwork assessment (see next section) to determine if existing ducts can support the new equipment.
- Efficiency targets that fit your priorities: AFUE for furnaces, SEER and HSPF for heat pumps, and variable-speed options for best comfort.
- System pairing: matching heating equipment to your cooling system to preserve efficiency and airflow.
- Brand and feature selection: balancing reliability, parts availability, and efficiency. Common, dependable brand options used in the region include Trane, Carrier, Lennox, Rheem, Goodman, Mitsubishi, and Daikin, with choices ranging from basic reliable units to high-efficiency variable-speed systems.
Ductwork evaluation and modifications
Healthy ducts are critical in Palm Springs, where homes often rely on HVAC systems year-round:
- Inspect for leakage and poor seals. Leaky ducts lose conditioned air into crawlspaces or attics.
- Measure static pressure and airflow to ensure proper fan sizing and to identify restrictive runs or undersized returns.
- Check insulation on ducts in unconditioned spaces; uninsulated ducts increase heat loss.
- Identify balancing needs such as adjusting registers or adding dampers for more even distribution.
- Plan required modifications: return upgrades, additional supply runs, or new plenums when switching system types (for example, adding a furnace to an AC-only system).
Professional installation steps
A reliable installation follows clear phases to protect your home and system performance:
- Site preparation: lock out power, protect floors and landscaping, and remove old equipment safely.
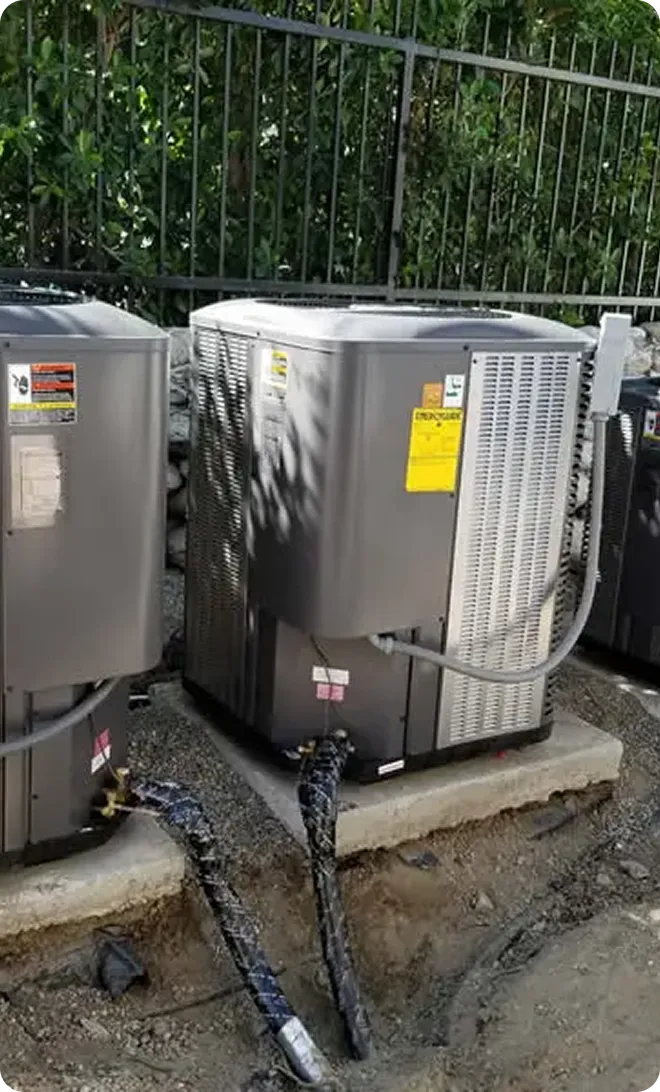
- Placement and mounting: locate outdoor units, flues, condensate lines, and indoor air handler or furnace in code-approved positions.
- Mechanical connections: refrigerant lines, gas piping, venting, condensate drains, and insulated duct transitions.
- Electrical and control wiring: properly sized breakers, disconnects, and thermostat wiring or smart thermostat integration.
- System start and leak checks: pressure and refrigerant integrity checks for cooling components; gas line and vent inspections for furnaces.
Commissioning and testing procedures
Commissioning is where professional installers prove the system meets performance expectations:
- Verify correct refrigerant charge and thermostat setpoints.
- Measure airflow and temperature split across the coil to confirm cooling and heating effectiveness.
- Conduct combustion analysis and CO checks for gas systems to ensure safe, efficient operation.
- Test safety controls: high-limit switches, pressure switches, and electrical protections.
- Calibrate and program the thermostat for optimal schedules and zoning where applicable.A documented performance test report should be provided to the homeowner showing measured values and sign-off.
Recommended brands and efficiency options
In Palm Springs, prioritize:
- Heat pumps with high HSPF and inverter-driven compressors for efficient winter heat and quiet operation.
- Modulating gas furnaces with high AFUE if gas is preferred for rapid heat and lower upfront cost.
- Ductless multi-zone systems (Mitsubishi, Daikin) where ductwork changes would be extensive.
- Matched system components—air handler, outdoor unit, and controls—from the same manufacturer to preserve warranties and performance.
Typical project timelines
- Initial consultation and load calculation: 1 to 2 hours onsite.
- Proposal and equipment selection: 2 to 7 days depending on options and homeowner decisions.
- Permit and ordering: 1 to 2 weeks if permits are required and equipment must be ordered.
- Installation: 1 to 3 days for a typical single-family home system change; 1 to 2 additional days if significant ductwork modifications are needed.
- Commissioning and homeowner onboarding: same day as final installation, typically 1 to 3 hours.
Homeowner onboarding and warranty information
A complete handover includes:
- A system walkthrough explaining routine operation, thermostat programming, and emergency shut-offs.
- Documentation: manufacturer manuals, warranty papers, and installer work orders.
- Warranty types: manufacturer warranties cover parts and compressors (common ranges vary by product), while labor or workmanship coverage is provided by the installing contractor. Read warranty terms carefully to understand registration requirements and maintenance obligations.
- Recommended maintenance plan: filter sizes and replacement intervals, annual tune-ups, and seasonal checks to preserve efficiency and warranty validity.
Long-term benefits and maintenance tips
Proper installation delivers:
- More consistent indoor comfort during cold nights and better integration with existing cooling systems.
- Lower operating costs when systems are sized and commissioned correctly.
- Improved indoor air quality through sealed ducts and proper filtration.Simple homeowner steps to protect the investment:
- Change filters regularly and use recommended MERV ratings for your system.
- Keep supply and return registers unobstructed.
- Schedule annual heating and cooling tune-ups to extend equipment life and maintain efficiency.
A heating installation in Palm Springs, CA that combines accurate sizing, thoughtful equipment selection for the desert climate, careful ductwork work, and thorough commissioning will deliver reliable comfort, efficient operation, and fewer surprises over the life of the system.

hear what our satisfied
clients have to say


.webp)