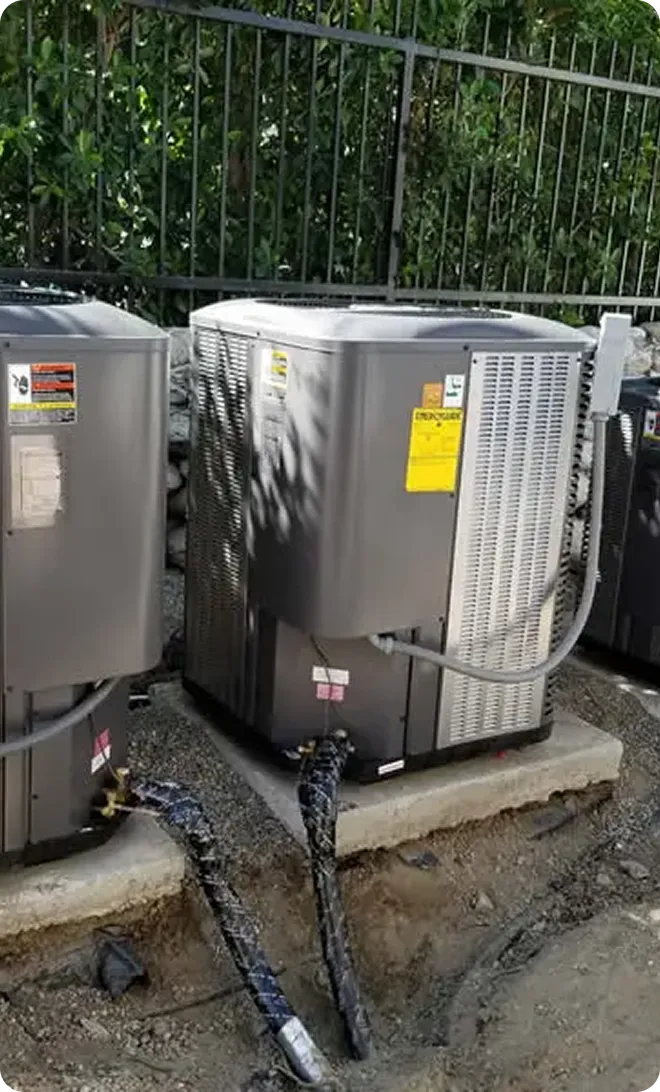
Heat Pump Repair in Rancho Mirage, CA
Heat pump repair in Rancho Mirage, CA covers diagnostic steps, common issues such as capacitor failures, refrigerant leaks, wiring faults, and reversing valve problems; it explains a structured troubleshooting process with detailed steps, typical repair timelines, and parts used. It also describes emergency response options, warranty expectations, and documentation practices.
.jpg)
Heat Pump Repair in Rancho Mirage, CA
A properly functioning heat pump is essential for year-round comfort in Rancho Mirage, CA. With hot, dusty summers and cooler desert nights in winter, heat pumps here work hard and face unique stresses.
Why timely heat pump repair matters in Rancho Mirage
Rancho Mirage’s high daytime temperatures, frequent on/off cycling, and airborne dust shorten component life and increase the likelihood of failures like burned capacitors, clogged coils, and refrigerant leaks. Delaying repair can lead to more extensive damage (for example, a failed capacitor that later damages a compressor), higher energy bills, and uncomfortable living spaces during extreme heat. Quick, expert diagnostics can restore reliable operation and prevent costly secondary failures.
Common heat pump issues in Rancho Mirage
- Capacitor failure — Capacitors are prone to heat-related burnout; symptoms include humming, slow fan/blower, or unit not starting.
- Compressor problems — Overloads, motor failure, or internal mechanical issues result in no cooling/heating or tripped breakers.
- Refrigerant leaks — Low refrigerant causes poor performance and frozen coils; desert conditions and vibrations can accelerate line wear.
- Electrical component failures — Contactors, relays, fuses, and control boards can fail due to heat and frequent cycling.
- Reversing valve issues — Valve sticking or electrical failure causes the unit to be stuck in heating or cooling mode.
- Airflow problems — Dirty filters, blocked return vents, or dirty coils reduce efficiency and stress components.
- Fan or motor failures — Condenser or blower motor wear from dust and frequent use reduces airflow and performance.
Step-by-step troubleshooting process
A structured diagnostic avoids unnecessary parts replacement and identifies the true root cause.
- Initial safety and system check
- Verify homeowner safety (no burning smells, visible refrigerant oil, or electrical hazards).
- Confirm thermostat settings and call for heat/cool.
- Check breakers and disconnect switches.
- Airflow and filter inspection
- Inspect and test filter condition, return/supply vents, blower wheel and fan operation.
- Measure static pressure if airflow problems are suspected.
- Electrical diagnostics
- Test capacitors, contactors, relays, and voltage at the unit.
- Inspect wiring and control board for burned contacts or loose connections.
- Refrigeration system evaluation
- Check refrigerant pressures and superheat/subcooling to detect leaks or undercharge.
- Inspect coils for icing or contamination.
- Use leak detection tools where pressure indicates leak.
- Compressor and motor tests
- Measure amp draw and resistance on motors and compressor windings.
- Listen for mechanical noises indicating internal failure.
- Reversing valve and controls check
- Verify correct operation and control signals for heat/cool mode changes.
- Test pilot solenoids and valve actuators.
- Report and repair plan
- Provide a clear, written diagnosis listing failed components, recommended repairs, parts required, and estimated timeline.
Typical repairs, parts used, and timelines
- Capacitor replacement — Parts commonly replaced and typically completed in 1 to 2 hours.
- Contactor or relay replacement — 1 to 2 hours; common cause of intermittent operation.
- Fan or blower motor replacement — 2 to 4 hours depending on access and parts.
- Refrigerant leak repair and recharge — 4 hours to multiple days depending on leak location and severity; includes evacuation, repair, and reclaim/recharge.
- Compressor replacement — 4 to 8 hours or more; may require evacuation, manifold work, and oil/refrigerant matching.
- Reversing valve replacement — 3 to 6 hours; involves refrigerant recovery and recharging.
- Control board replacement — 1 to 3 hours; requires testing and configuration.
Parts commonly used: run/start capacitors, contactors, relays, fan/blower motors, compressors, reversing valves, filter driers, pressure switches, control boards, thermostats, and refrigerant (type specified by the system).
Emergency response and homeowner guidance
Heat-related failures in Rancho Mirage can become urgent during seasonal temperature peaks. Standard emergency response options include:
- Priority diagnostics and same-day or next-day scheduling for heat-critical systems.
- Temporary measures such as isolated component bypasses or auxiliary cooling recommendations when safe and feasible.
- Safety steps for homeowners: if you detect burning smells, visible sparking, or oil on lines, turn off the unit at the disconnect and main breaker and avoid operating the system. Do not attempt to repair refrigerant leaks or electrical components yourself.
Technicians follow refrigerant handling regulations and use sealed recovery equipment; homeowners should not attempt DIY refrigerant work.
Warranty and documentation practices
Expect written warranties for parts and often a separate labor warranty on repair work. Common warranty formats:
- Manufacturer warranties on major components (compressors, coils) vary by brand and can extend several years.
- Aftermarket parts typically carry limited parts warranties (often 1 to 5 years depending on the component).
- Labor warranties on repairs commonly range from 30 days to 1 year; verify duration and what is covered.
Always request a written invoice detailing parts, serial numbers, refrigerant amounts, and the diagnostic notes. For refrigerant work, documentation is often required for regulatory compliance and future service.
When repair is more cost-effective than replacement
Consider repair when:
- The heat pump is less than about 10 years old and the expected remaining life is several years.
- The repair cost is significantly less than the replacement cost (a common guideline: repair if the cost is less than roughly 50% of a replacement and the system’s remaining life expectancy is reasonable).
- The issue is an isolated component failure (capacitor, contactor, fan motor) rather than systemic problems like frequent compressor failure or major refrigerant system corrosion.
- The system uses a modern refrigerant (not burdened by limited availability) and meets your efficiency needs.
Consider replacement when:
- The unit is older (typically 12 to 15+ years), has had multiple major repairs, or uses phased-out refrigerants that are expensive to service.
- Repeated compressor or coil failures occur, indicating progressive degradation.
- Upgrading will deliver substantial energy savings and improved reliability.
In Rancho Mirage, the desert environment often shortens equipment lifespan. High operating hours and dust accumulation mean older systems may be better replaced to regain efficiency and reliability.
Preventive tips to extend life and reduce repair needs
- Replace or clean filters monthly during heavy use seasons.
- Keep the outdoor unit free of debris, landscaping, and dust buildup; clean coils annually.
- Seal and insulate ductwork to reduce strain on the system.
- Schedule routine tune-ups before summer and winter seasons to catch issues early.
- Use a programmable thermostat to reduce cycling and unnecessary run hours.
Timely diagnostics and repairs preserve comfort, protect system life, and keep energy use in check. In Rancho Mirage, proactive maintenance combined with targeted repairs is often the most cost-effective path to reliable year-round comfort.

hear what our satisfied
clients have to say


.webp)